I was finally able to finish my first piece of furniture which will go inside the house and hopefully fit in without looking like an amateur DIY. I followed a plan from Black & Decker Easy Wood Furniture. This build involved a lot of gluing pine boards edge to edge. Many pieces are required to be 14" wide. I think the largest piece was the back at 14"x19". I bought two 1x10" and four 1x6" pine boards. The only other pieces were hardware: an outlet, extension cord, a drawer slide, and a drawer knob.
I started by cutting all the pieces that needed to be edge glued to length but kept them about a half inch long. I glued them all up night after night after edge-jointing for a snug/90 degree glue job. I took these glued up pieces and cut them to length, ripped them to the correct width, and planed/sanded the joint flat. Then, as instructed by the directions, I built a box with those pieces. It ended up being the sides, bottom, and top. I cut out the top rails (which are great for decoration and for not pushing your phone or alarm clock off the edge), routed the pretty edge on the top, and attached them. Then I put that on the top of the carcass and started in on the base. It also had decorative cuts. The oscillating spindle sander makes these concave curves a breeze. I used 1 1/4" brad nails with my pneumatic brad nailer to attach everything in addition to wood glue.
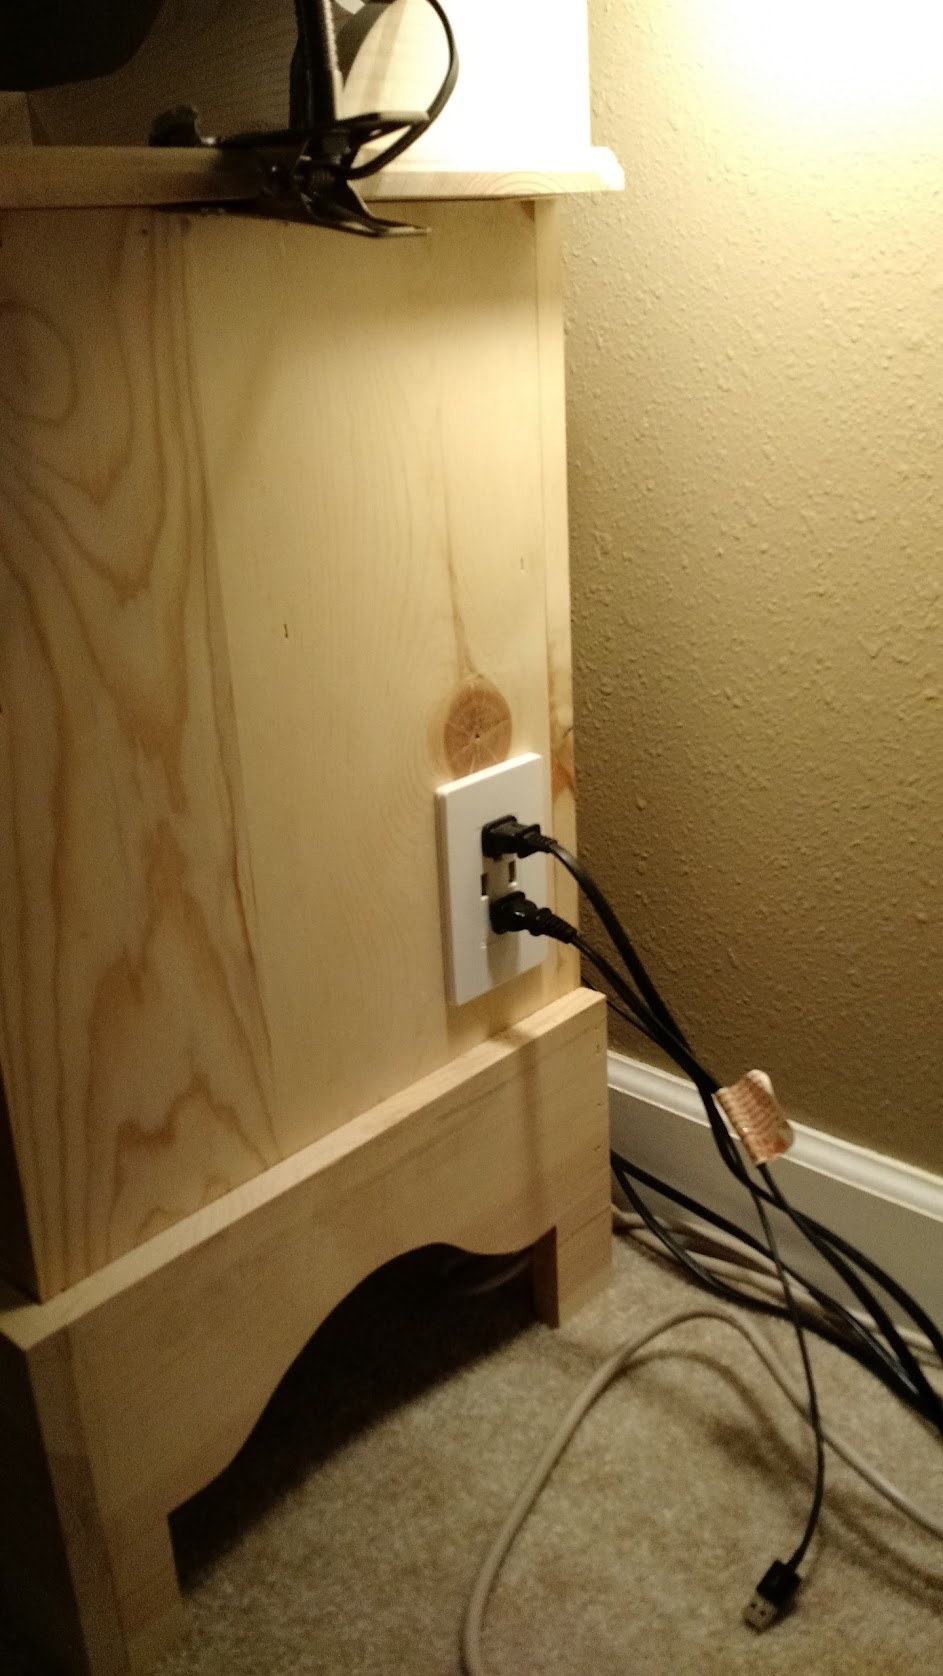
I installed a receptacle which has two USB charging slots and two regular 120V AC outlets. This has been amazing for charging a phone, tablet, and still being able to plug in a reading lamp and alarm clock! I have a 8' cord running out the back of the nightstand which needs to be plugged into the wall. With this plugged in, the nightstand becomes a little remote charging/power station.
The drawer went in with some elbow grease. The plans had a 1/4" gap on both sides of the drawer from the inside cabinet walls. The thinnest 12" slides I could find at Menards required 1/2" gap on both sides of the drawer! Of course I went shopping for the slides after building everything. I ended up using a multitude of tools to carve out about 1/4" of wood from each corner where the slide was going. Eventually it fit and now works great.
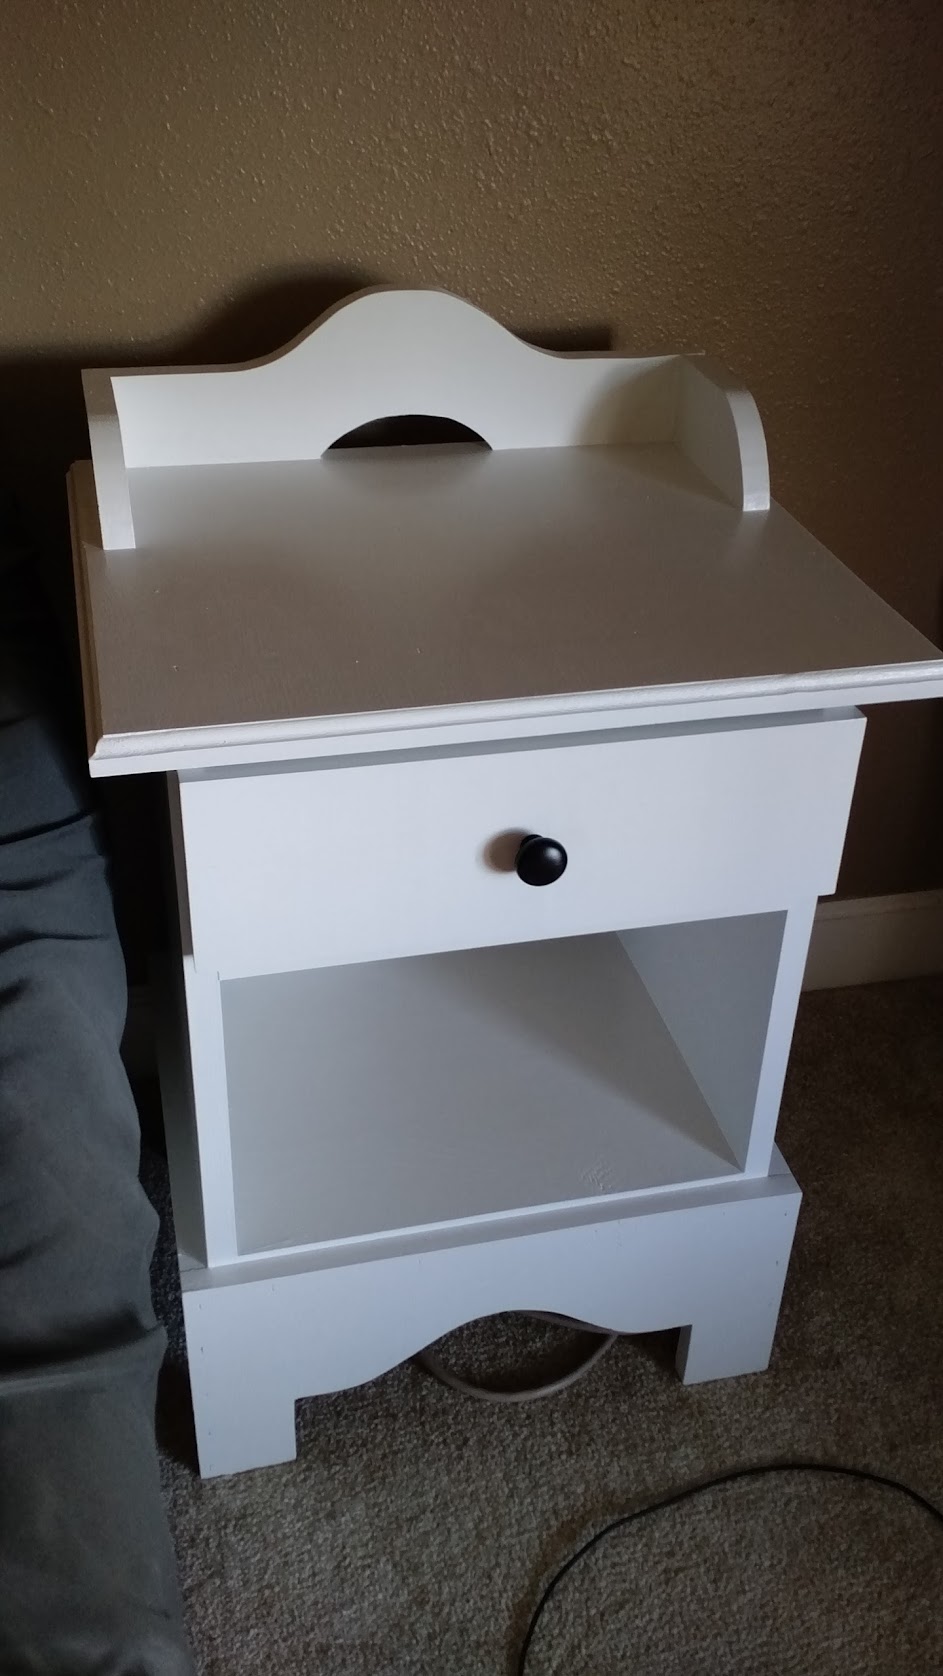
Kaytee and I finished it with 1 coat of primer over the whole thing. Then a coat of white paint. In all the normally-visible areas, I put on a second coat of white paint. It turned out very nice. All the trim and doors in the house are painted white. So it fits right in. I've not painted many projects, but now I'm excited to paint a few more; it's not that hard!
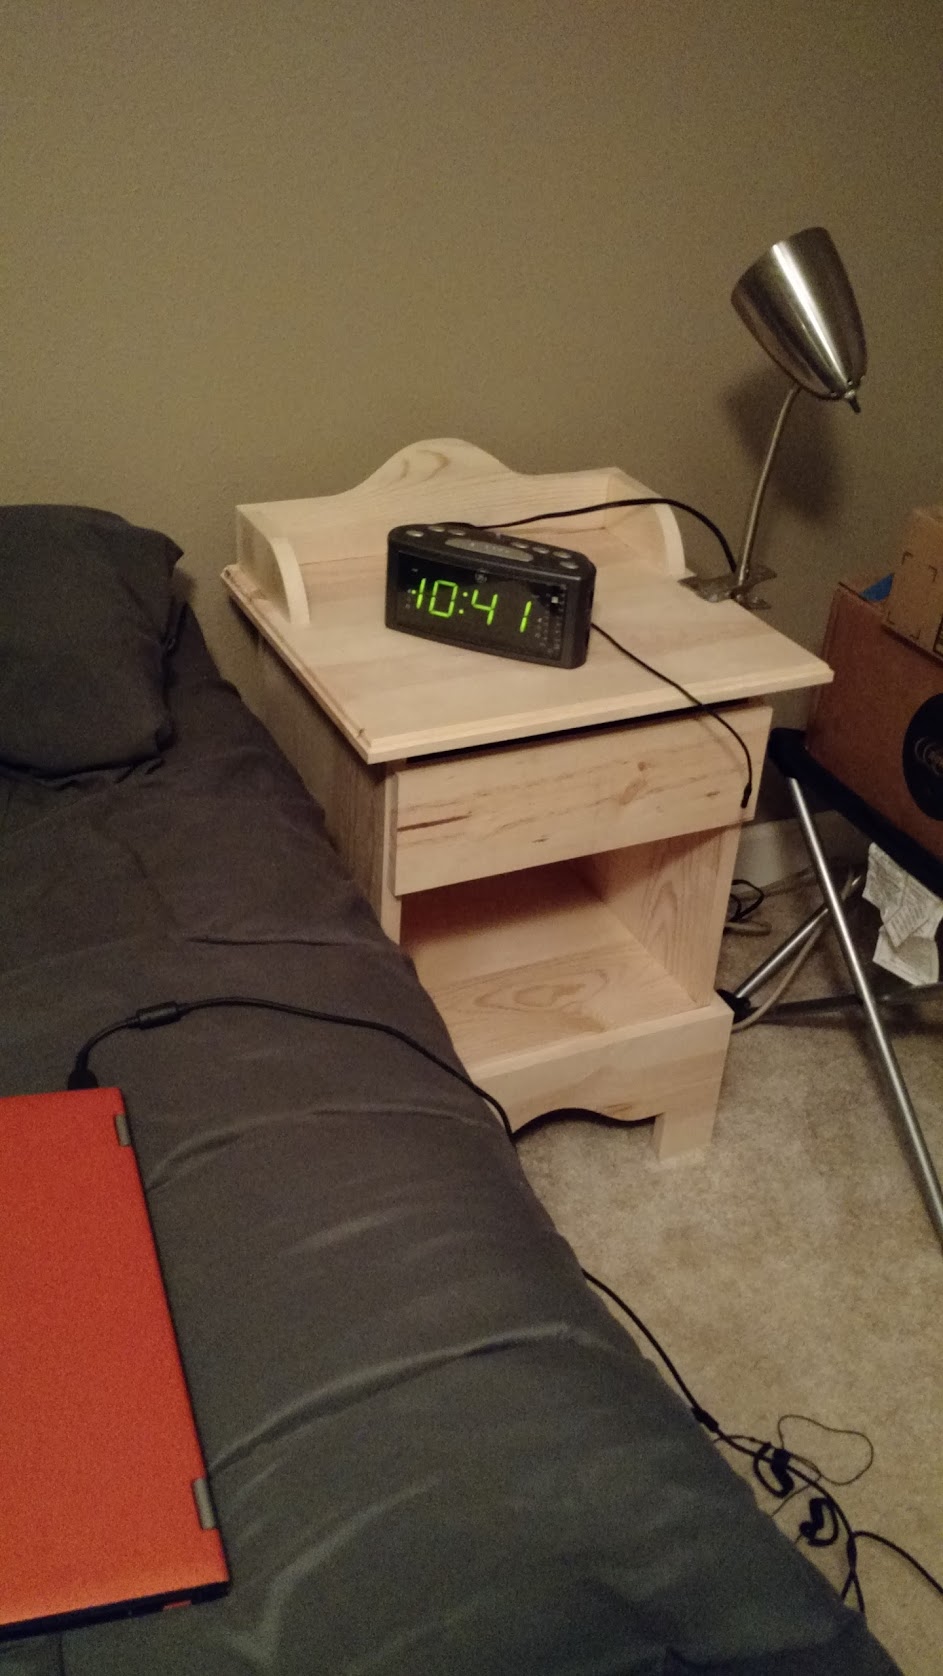
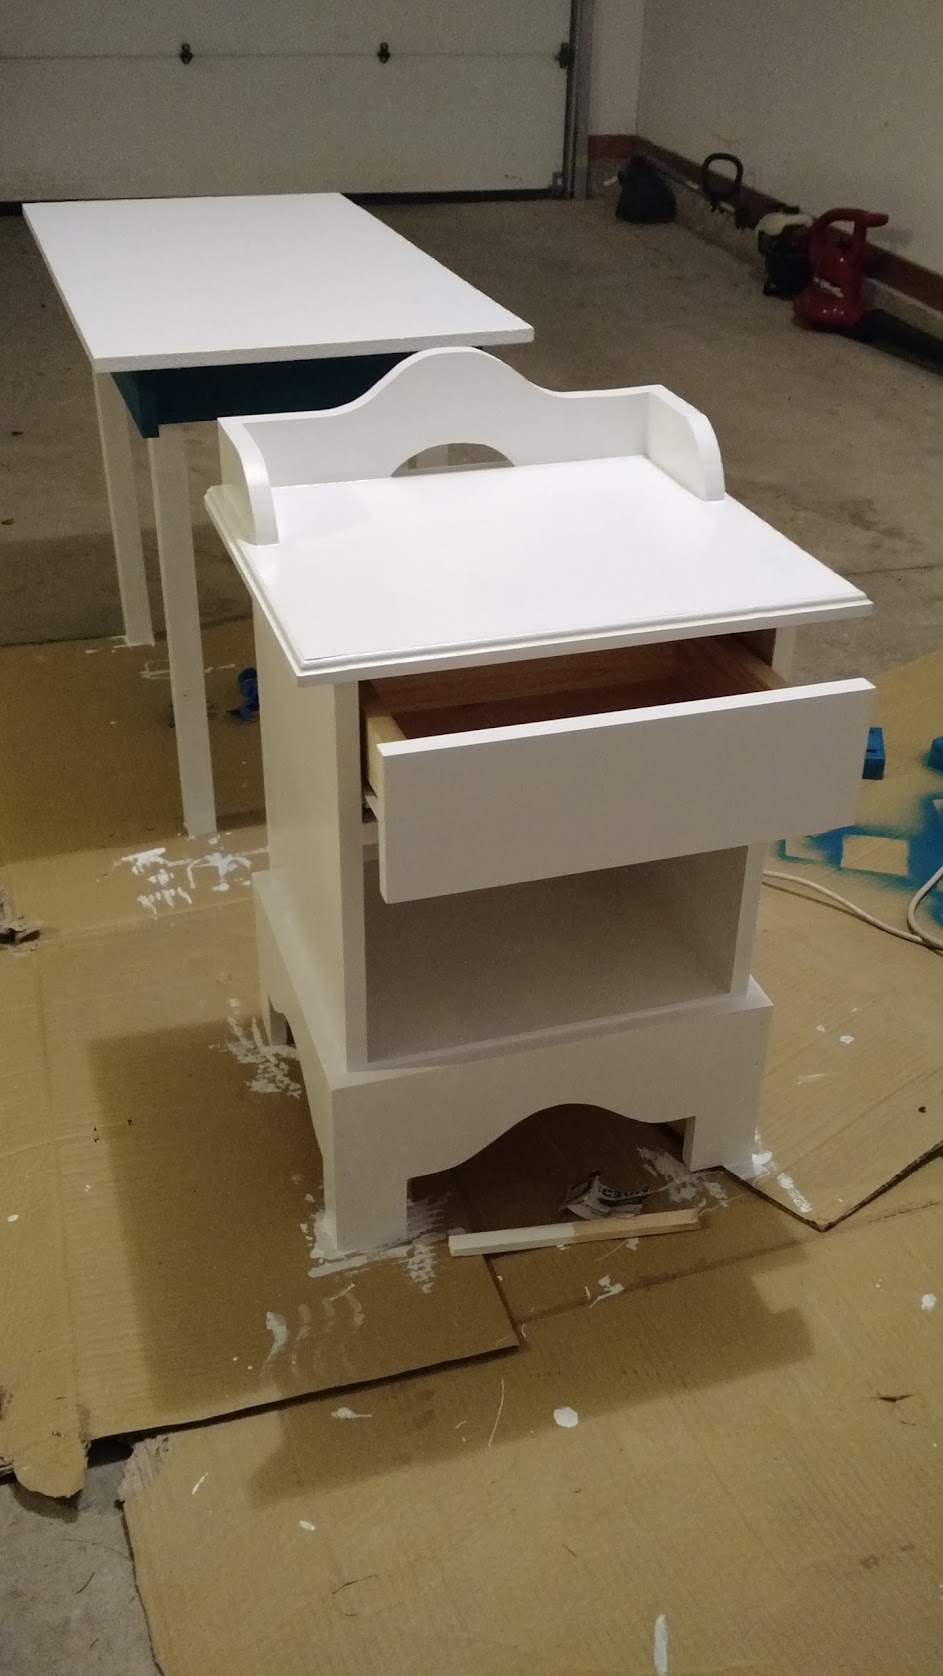
Here are some pics throughout the process. I need to improve at taking more throughout the building process.
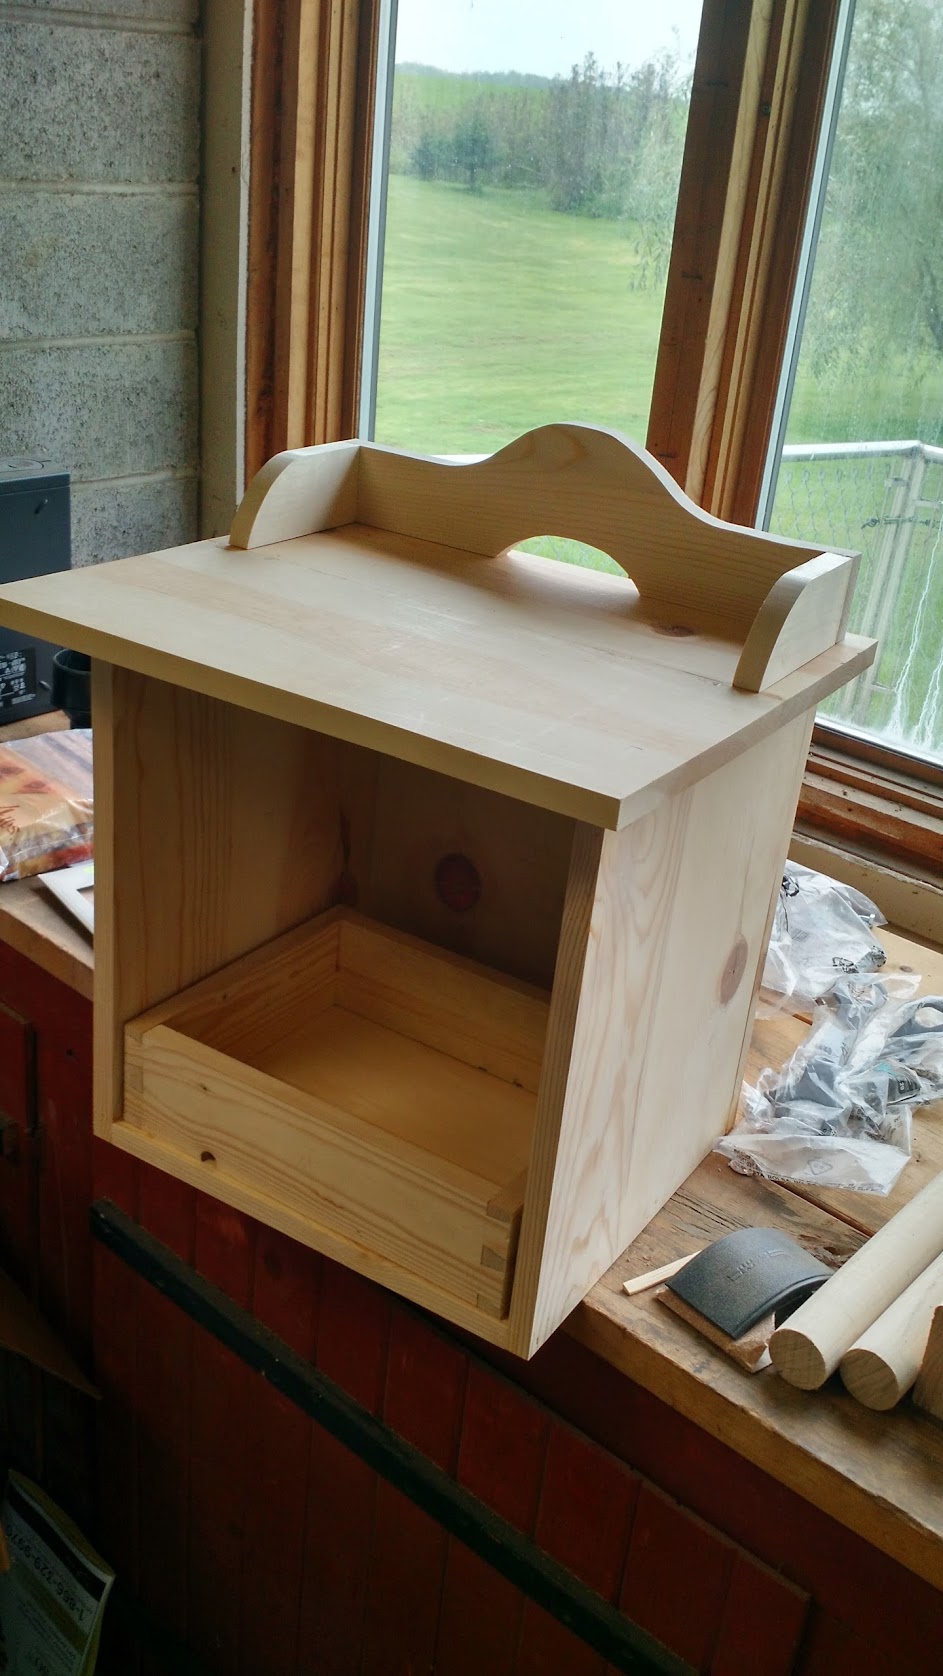
Note on the above picture: the design did not call for dovetails, but I thought it'd be good practice!

Completed: