I recently completed an electronics project for my son's room which I'm calling a "moon lamp." It's more or less a smart night light that's attuned to the phase of the moon! The lamp lights up LEDs in the shape the moon appears in the night sky. This post will go over its features, missing features, and technical details about the build. I'll also include some pictures at the end.
Features
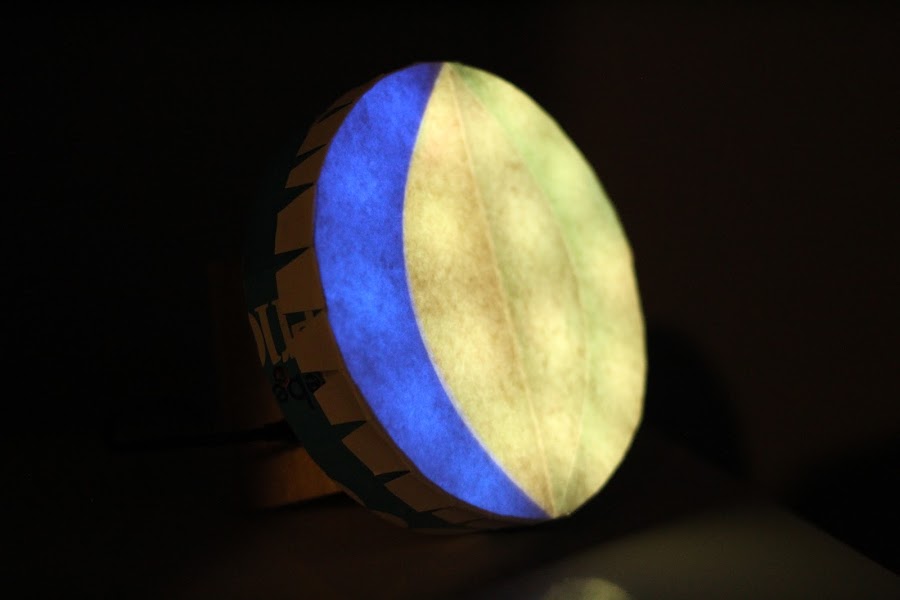
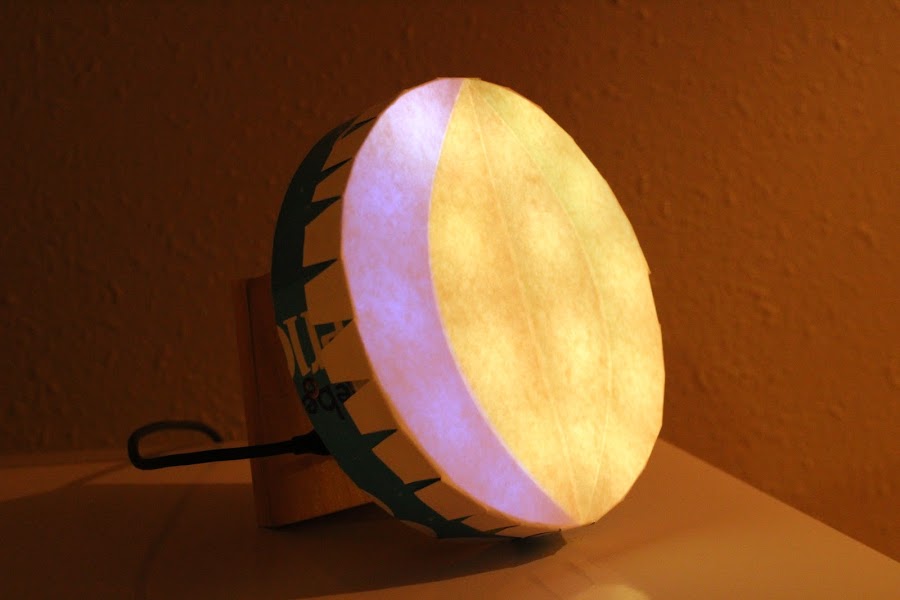
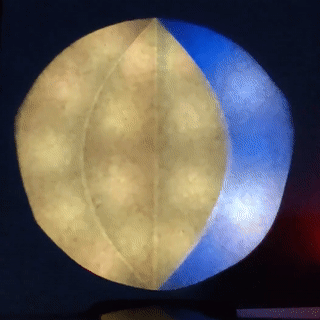
Most obviously, the LEDs indicate the current moon phase with the capability to show 8 phases: new moon (empty), waxing and waning crescent, waxing and waning gibbous, full, first quarter and third quarter.
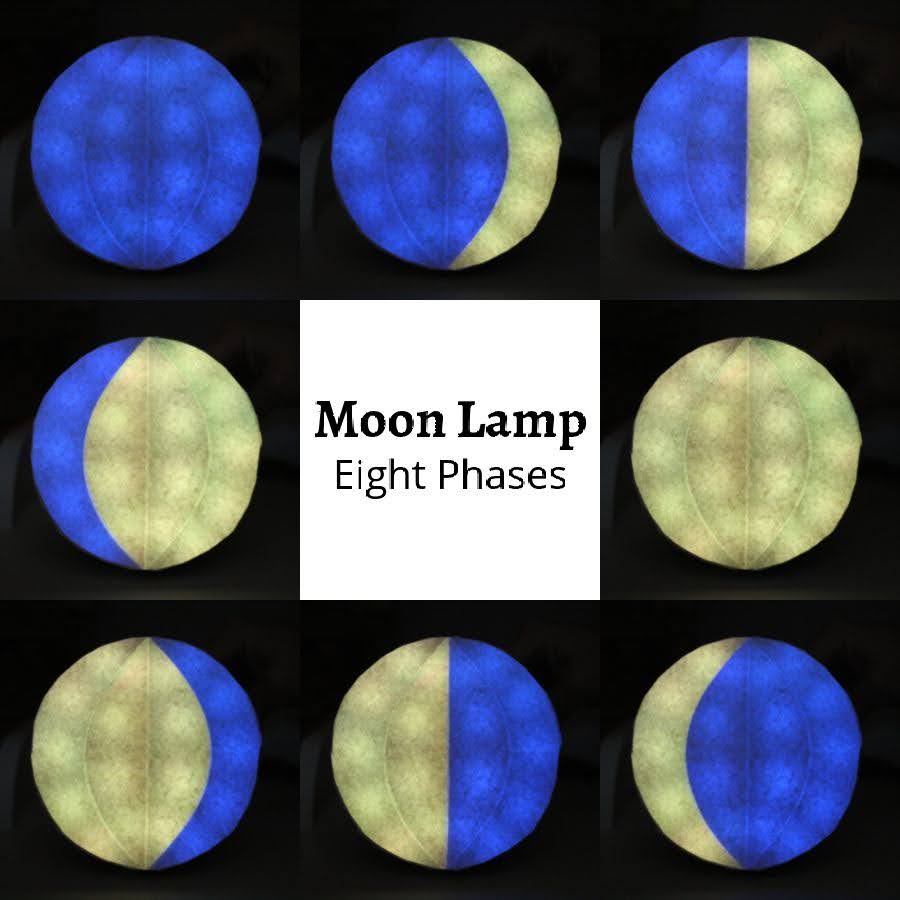
In "empty" sections of the moon, it appears as the night sky - dark blue with twinkling stars.
It's equipped with a coin cell battery (like one you'd find in a watch) which will keep track of the current date and time for a decade or two.
The code converts the UTC time which is kept by the real time clock module to my timezone (CST) (with daylight savings) so I can trigger certain events at the correct local time. Using this calculated local time, the lamp automatically turns off in the morning and turns on in the evening. This behavior can be disabled with a toggle switch.
A nice animation is displayed when the lamp turns on. It quickly cycles through all 8 phases before showing the current phase.
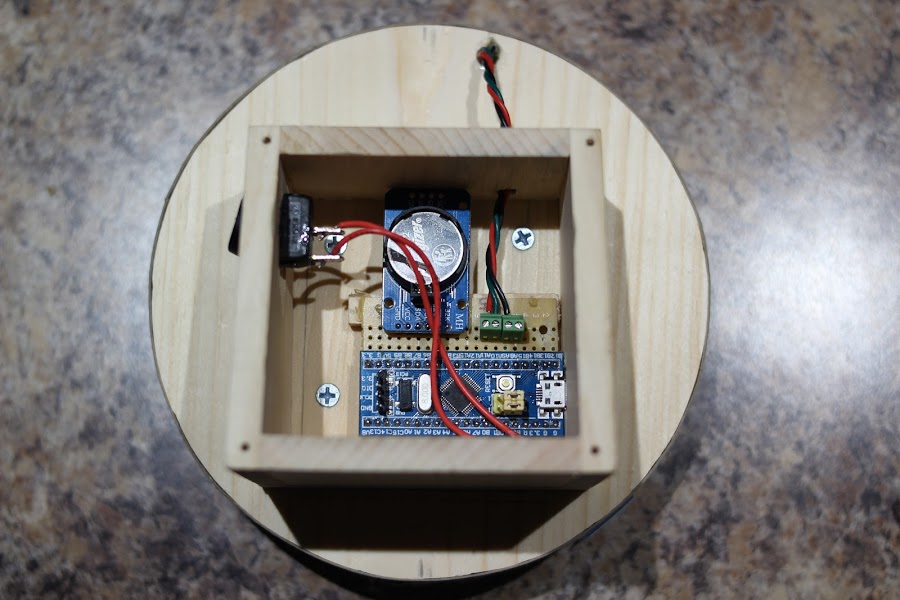
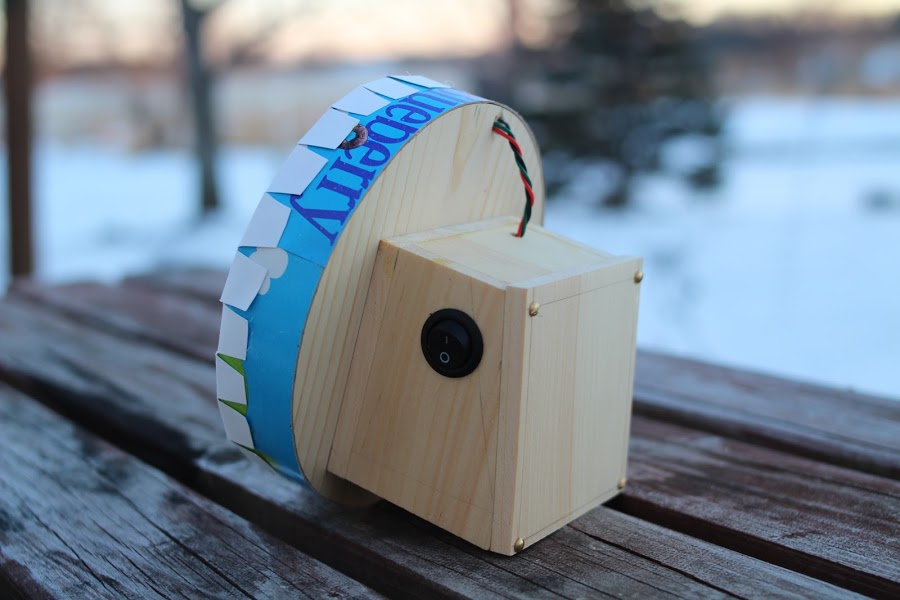
All electronics are enclosed in a custom wooden box I made for the project.
Future Features
Ability to set the time! Right now I just have to hope the coin cell battery keeps the clock ticking. The only way I can set the time is a very manual process: re-programming it. I've been considering some options, but without some sort of display, feedback is difficult. I didn't want to add an LCD because it almost doubles the investment needed for this simple project.
A "sleep training" feature could indicate to children when they should be awake and when they should be staying in bed and sleeping.
My wife had an awesome idea to implement different colors and designs for certain days of the year. Birthdays, Christmas, Halloween, etc. I think that would be a very fun addition which the kids would love.
Technical Details
Let's dive in to how I built it. I'll discuss the hardware and the software. Pick what you're interested in.
Hardware
The brain of the device is an STM32F103 microcontroller mounted on a blue pill development board. I think I got mine on ebay for about $4. The only other IC is a DS3231 real time clock module (the linked site is not where I bought it, but a good overview). This is the device responsible for keeping track of the time. I also bought this on ebay for $5. The lamp also uses 18 RGB LEDs (WS2812B) which are sold in many configurations. It should be possible to get 18 for ~$10. It's kind of surprising the least electrically complex part costs the most.
I also used some things I had sitting in my electronics drawer: some perfboard for soldering, a switch for disabling night-only mode, some screw terminals to make it easy to assemble and disassemble, and of course some wire.
One thing that was hard to figure out was a proper way to diffuse the LEDs. I ended up using some heavy paper (card stock) positioned about 3/4" away from the lights. This did a pretty good job and was pretty simple. Some downsides are that you can see the fibers of the paper, children can easily destroy it, and it cuts out a quite a bit of light, dimming the LEDs.
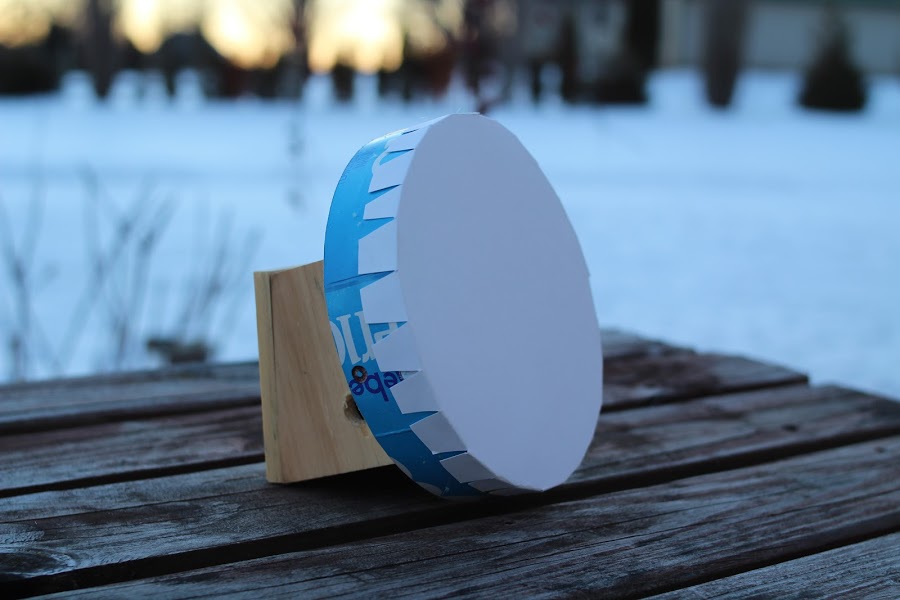
The rest of the structure is provided by some wood (pine), a blueberry cheerios cereal box, and hot glue. You can see evidence of each in the pictures below.
Software
I wrote the firmware in Rust. This is the second embedded project where I've chosen Rust as the language, and it went pretty well! My favorite part was being able to use its package management system (cargo) to easily depend on crates which make it easy to interact with my peripherals! In particular, I used this crate for communicating with the RTC module and this crate for communicating with the string of LEDs.
If you're new to the world of embedded Rust, you might wonder: there are thousands of microcontrollers and each are unique, how does there exist a crate which controls your particular microcontroller for interaction with those peripherals? Well good question. This is accomplished by several things working together, all thanks to the Rust embedded community.
Essentially there's a crate called embedded-hal (HAL is hardware abstraction layer) which contains several traits which define implementation contracts between the device and my application. Then the community writes a crate for my board which implements these traits. Then other community members write drivers for peripherals (like the LEDs and RTC) which use the traits inside embedded_hal. With the combination of those three, I can write very high-level code to interact with peripherals! Something like this:
let i2c = // Set up I2C which is a construct from embedded_hal
let mut rtc = Ds323x::new_ds3231(i2c); // Ds323x takes i2c as input
let current_date_time = rtc.get_datetime();
If you'd like to understand more about the Rust embedded ecosystem, check out this information from The Embedded Rust Book. They explain it better and more thoroughly than me.
I'll stop there about the code. Read the source if you're interested, and ask me questions on GitLab!
Conclusion
I had a great time building this lamp, and my son really likes it. It's definitely the neatest electronic project I've built, and I'm excited to take on more embedded projects. I recently added an oscilliscope to my arsonal which opens up a lot of circuit debugging capability!